A Beginner's Guide to Creating Your First EC2 Instance: Unleashing the Power of AWS


Introduction
Amazon Web Services (AWS) offers a vast array of cloud computing services, and Amazon Elastic Compute Cloud (EC2) is one of its most popular offerings. EC2 allows you to create and manage virtual servers in the cloud effortlessly. If you're new to EC2 and looking to dive into the world of cloud computing, this step-by-step guide will walk you through the process of creating your very first EC2 instance.
Step 1: Signing up for AWS
Before you can create an EC2 instance, you need an AWS account. Visit the AWS website and click on the "Create a Free Account" button. Follow the instructions to set up your account by providing the necessary information.
Step 2: Accessing the AWS Management Console
Upon successful account creation, access the AWS Management Console. This can be achieved by selecting the "Sign-In to the Console" button on the AWS homepage. Enter your login credentials to gain console access.
Step 3: Launching an EC2 Instance
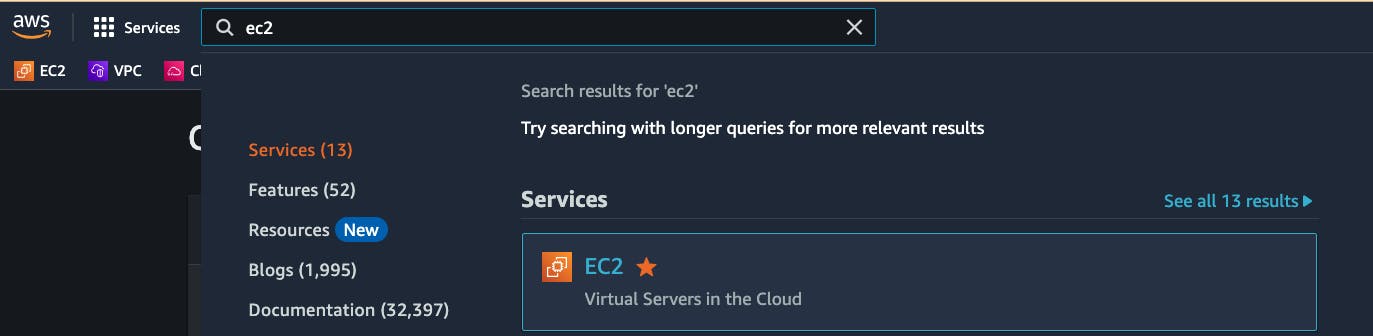
In the AWS Management Console search bar, enter EC2, and click the EC2 result under Services:
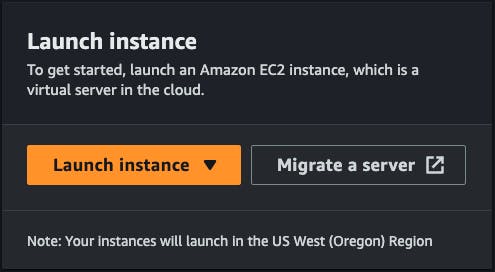
Click the Launch instance drop-down and click Launch instance:
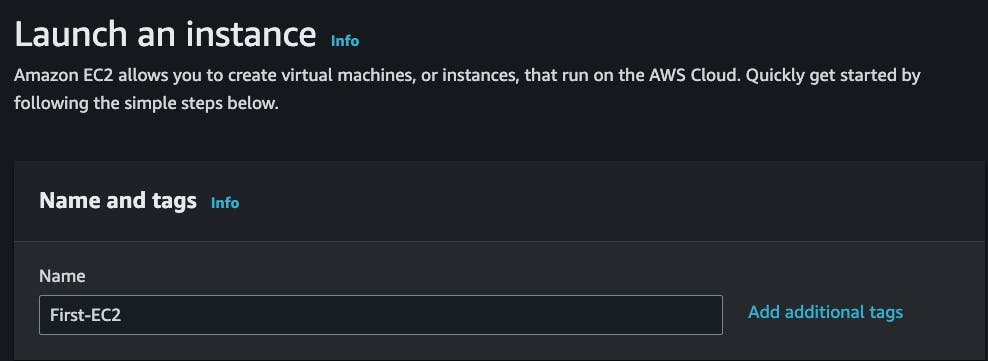
You will be directed to the Launch an instance wizard.
In the Name and tags section, an optional name can be added that will create a tag that will have the key of Name. Additional tags can also be created here.
Tags are specified as Key/Value pairs. They are not mandatory although it is useful to tag all of your AWS resources in production environments to stay organized.
In the Application and OS Images section, select the Amazon Linux 2 AMI (HVM) - Kernel 5.10 option under Quick Start:
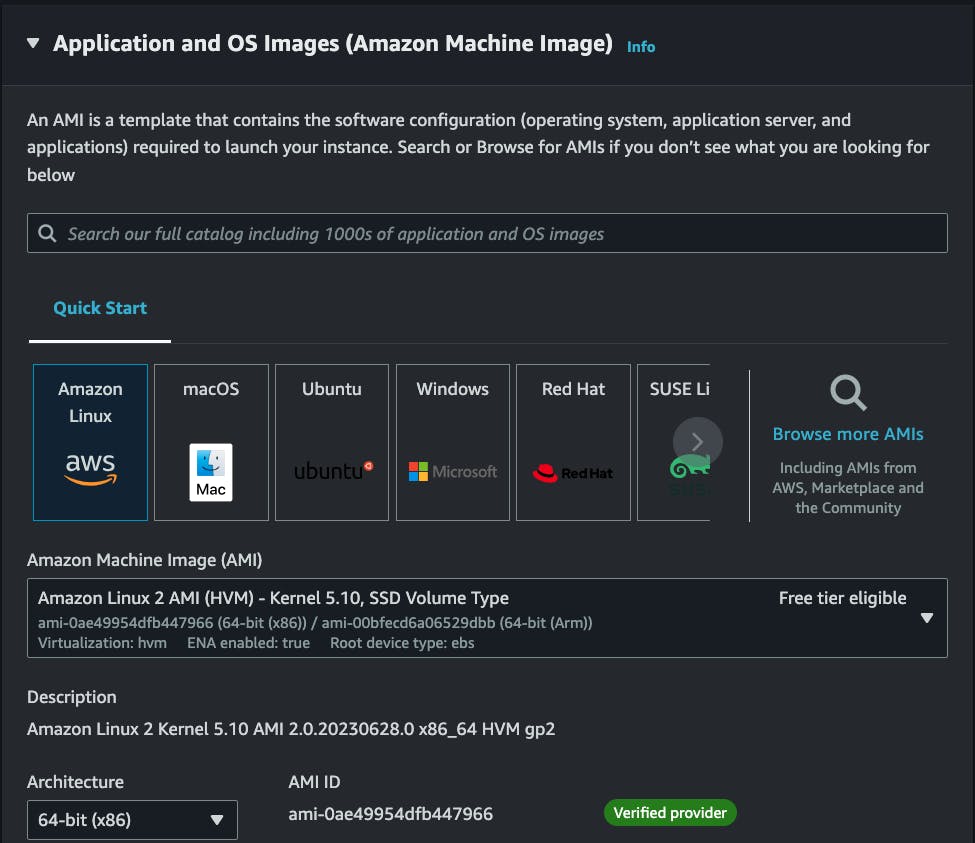
As you can see, Amazon provides many AMIs, including the most popular versions of Linux and Windows, often in 32-bit and 64-bit variants. Look at the supporting text to find out what other software packages and development languages are already installed on the image (such as Perl, Python, Java, etc.). You can think of AMIs as the blueprint or DNA of the instance you plan to launch.
In the Instance Type section, you should not change any options. Simply make sure the default t2.micro is selected which is catered for under the free tier account you have created:
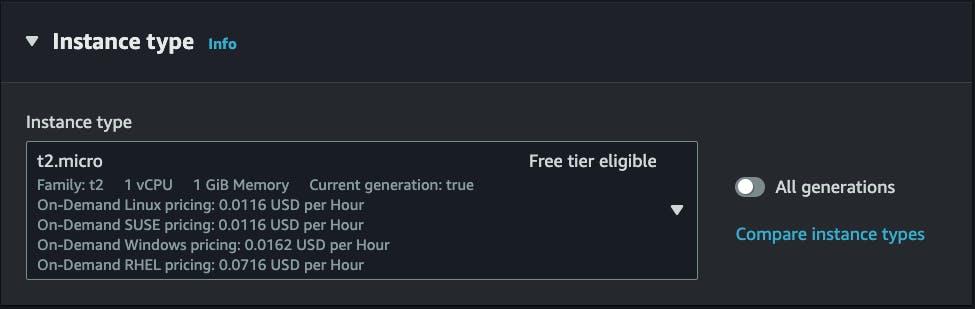
For whatever Instance Type is selected, the Currently selected list provides a helpful summary of hardware resources (such as the CPU type, number of virtual CPUs, memory, and pricing).
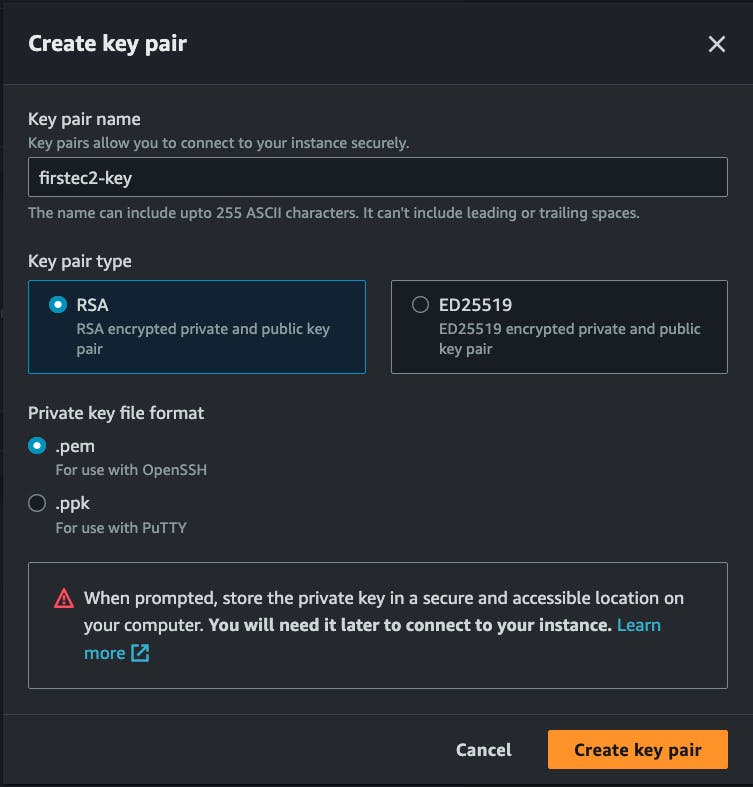
In the Key pair section, click on Create new key pair, enter <the name you wish> for the Key pair name, keep the default value for Key pair type and Private key file format, and click Create key pair. The key pair will begin downloading a file named <the name you wish>.pem on your local system. It contains a private key that you can use to connect to the EC2 instance via SSH.
Security groups control the inbound and outbound traffic to your instance. You can create new security groups or choose existing ones. Define the necessary rules to allow access to your instance, such as SSH or HTTP. In the Network settings section, read the supporting text under Security groups (Firewall), and ensure the Allow SSH traffic from box is checked and Anywhere is selected:
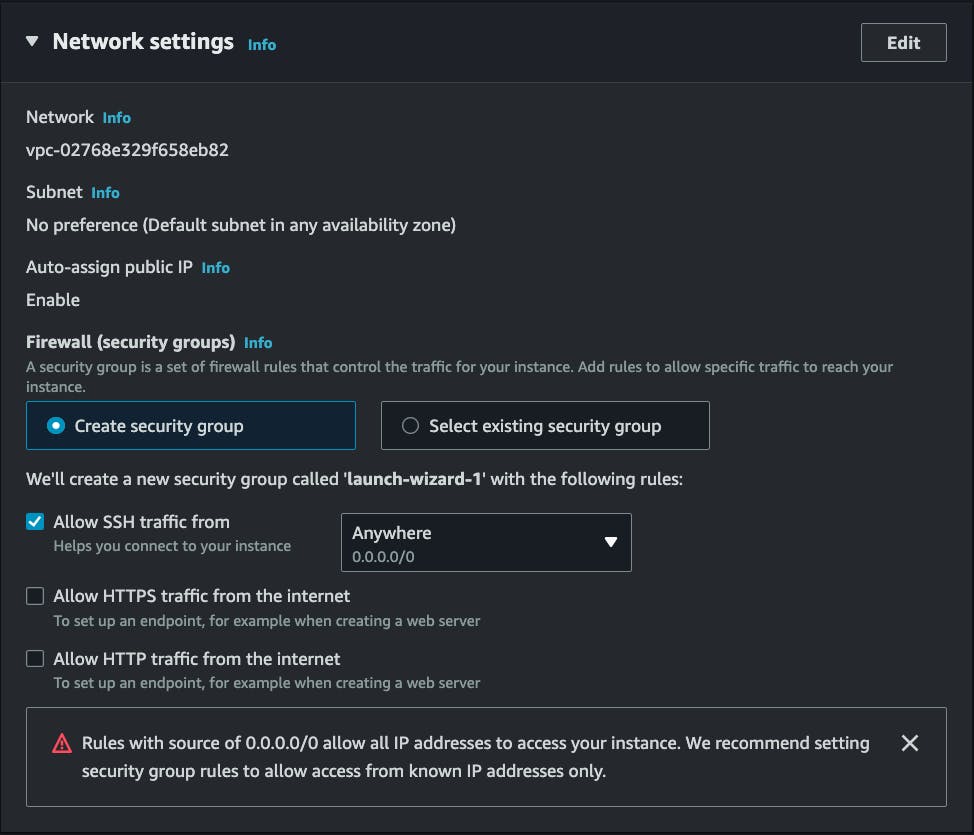
The Warning from AWS is letting you know the default configuration for the security group that is about to be created will grant SSH access from any source IP address (0.0.0.0/0). Production environments should be more restrictive.
Tip: A handy feature for testing purposes is to select My IP from the Source drop-down. That will restrict SSH access to only your current IP address. In network environments with Dynamic Host Configuration Protocol (DHCP), multiple routers or firewalls, and other features that make IP addresses subject to change, this setting is not a permanent security feature. However, it is sometimes a helpful feature while you perform various tests using your EC2 instance.
In the Configure storage section, ensure the default values of 8 GiB and gp2 Root volume is selected:
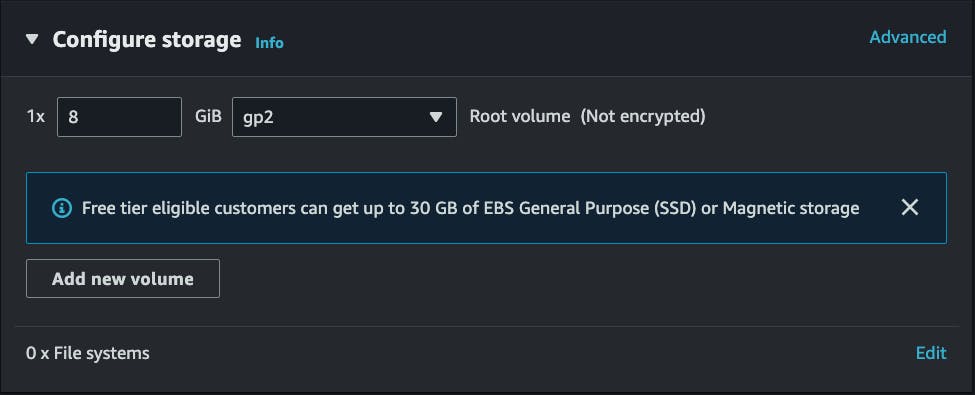
NB: You can personalize the storage settings to meet your preferences.
Click on Advanced details to expand the section and take a minute to look over the various configurations:
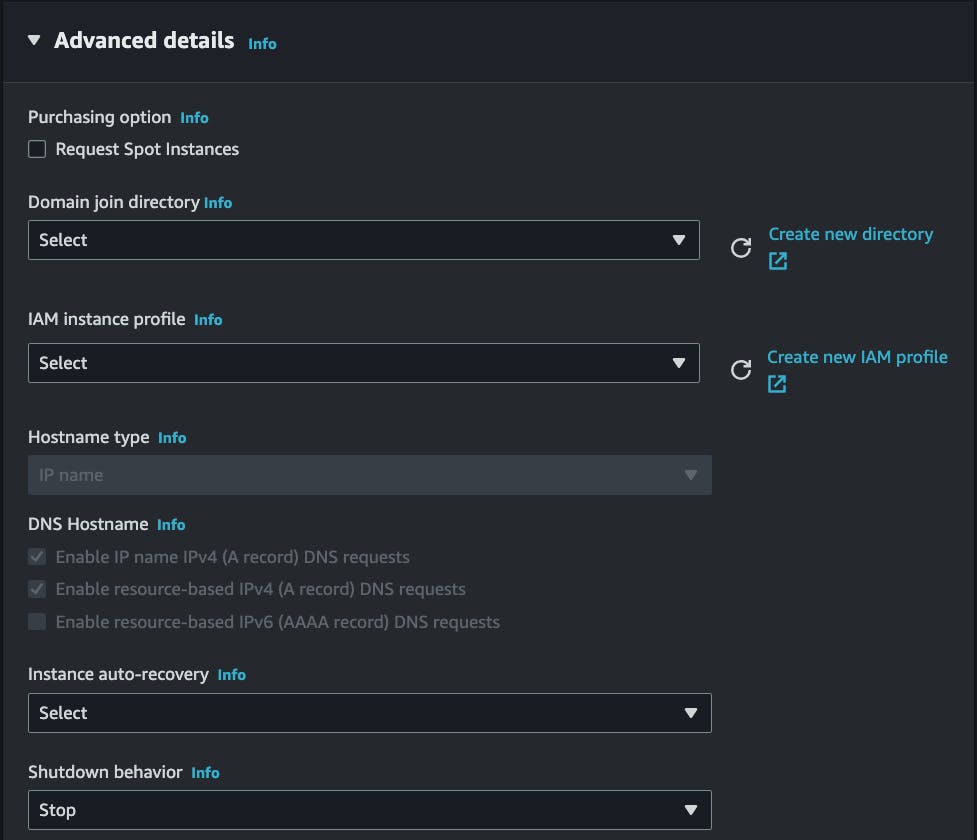
You can configure many different options on this page of the wizard, but it's best to keep your first launch simple. Skim the different fields, but leave the default values. If you are particularly interested in any particular field, hover over the i information icon next to it for a basic description. The information icon is a useful feature for easing your learning curve while using the AWS Console. In many cases, the help text also includes a link to related documentation.
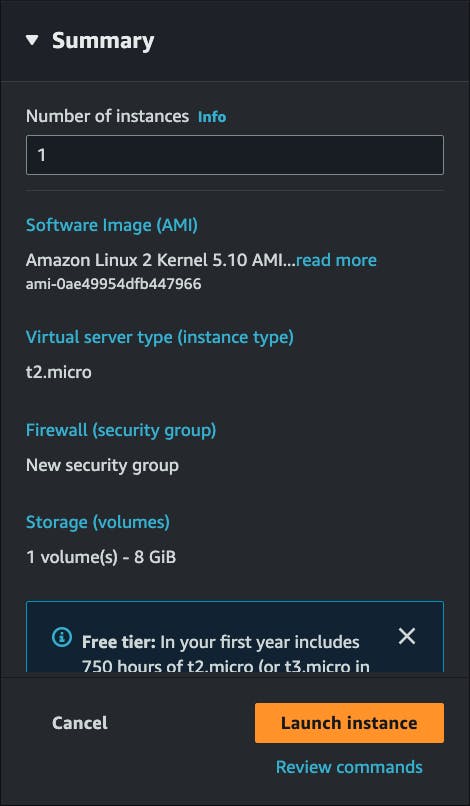
Take a final look at your instance's configuration in the Summary section. If everything appears correct, click the Launch instance button to create your EC2 instance:
A confirmation page will let you know that your instance is launching:
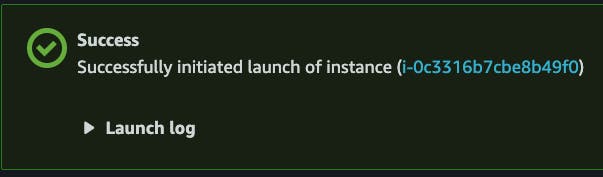
Click the View all instances (lower right) to close the confirmation page and return to the Instances screen of the EC2 console.
You can view the status of your instance on the Instances screen of the EC2 console:
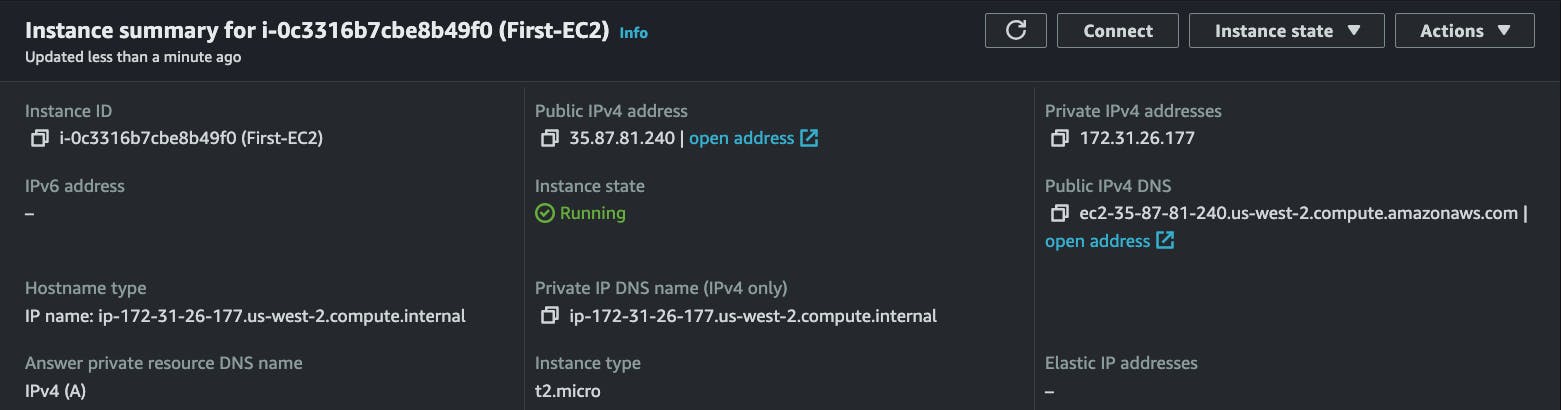
The Details tab contains a wealth of information on your instance. When you launch an instance, its initial Instance state defaults to Pending. After the instance starts, its Instance state transitions to Running, and it receives a Public IPv4 address and Public IPv4 DNS name. It typically takes about 30 seconds for the AWS Linux instance to transition to a running state.
Congratulations...you just launched your first EC2 instance!
Step 4: Connect to the EC2 instance via SSH with PEM keys
To manage a remote Linux server, you must have an SSH client. Secure Shell (SSH) is a cryptographic network protocol for securing data communication. It establishes a secure channel over an insecure network.
Linux distributions and macOS come with a functional SSH client that accepts standard PEM keys. Windows does not come with an SSH client. Therefore, this guide is instructions for users running Linux/macOS.
Open your Terminal application
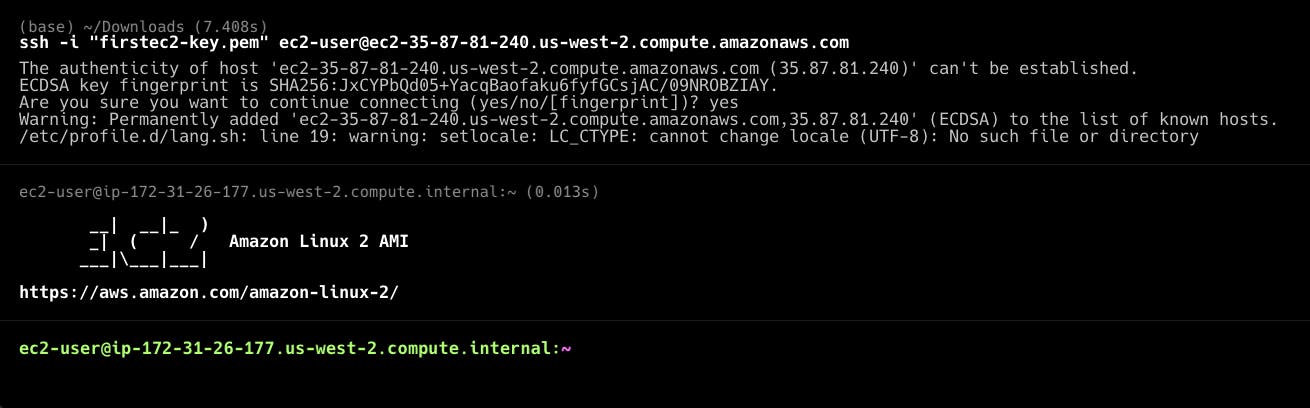
Run the following ssh command:
ssh -i /path/to/your/.pem-file/on/your/local/machine user@server-ipserver-ipis the Public IP of your server, found on the Details tab of the running instance in the EC2 Consoleuseris the remote system user (ec2-user for Amazon Linux) that will be used for the remote authentication. In this guide, you must use ec2-user.Note that the Amazon Linux AMIs typically use
ec2-useras a username. Other popular Linux distributions use the following user names:Debian: admin
RedHat: ec2-user
Ubuntu: ubuntu
Note: You can find the Public IP under the AWS EC2 console, and choose the available EC2 instance.
Your SSH client may refuse to start the connection, warning that the key file is unprotected. You should deny the file access to any other system users by changing its permissions. From the directory where the public key is stored on your local machine, issue the following command and then try again:
chmod 400 /path/to/your/.pem-file/on/your/local/machineThe change mode (
chmod) command shown above will change the permissions on your private key file so only you can read it. No other users on the system can modify it, or even read it.Now we can try running the SSH command to connect to the EC2 instance again:
Tip: The Instances page provides a helpful shortcut for connecting to a Linux instance. Select the running instance and click the Connect button. It will formulate an example ssh command for you, including the required key name and public IP address. However, it is still useful to learn the basics of manually using the ssh command.
Step 5: Running first commands - EC2 Instance Metadata
Now you are ready to send the first commands to your EC2 Linux instance. In this guide, you will check the EC2 instance metadata, which is only available from within the instance itself. Instance metadata is data about your instance that you can use to configure or manage the running instance. To obtain the instance metadata you will use the curl utility. cURL (Client URL) is a free, open-source project, and already loaded on your instance. cURL is a great way to transfer data using one of its supported protocols (such as HTTP).
Note: The IP address used below (169.254.169.254) is a special-use address to return metadata information tied to EC2 instances.
Note: The following steps use the Instance Metadata Service Version 1 (IMDSv1) method to access the instance metadata. By default, both IMDSv1 and IMDSv2 can be used. For more information regarding these methods, please reference the following AWS documentation.
List all instance metadata by issuing the following command:
curl -w "\n" http://169.254.169.254/latest/meta-data/To extract specific metadata append keywords to the end of the http path URL provided in the curl request. For example, you can easily check the list of security groups attached to the instance, its ID, the hostname, or the AMI ID. The "-w" command-line option tells curl to write the output to standard output (STDOUT).
Enter the following commands to extract specific metadata associated with your running instance:
curl -w "\n" http://169.254.169.254/latest/meta-data/security-groupscurl -w "\n" http://169.254.169.254/latest/meta-data/ami-idcurl -w "\n" http://169.254.169.254/latest/meta-data/hostnamecurl -w "\n" http://169.254.169.254/latest/meta-data/instance-idcurl -w "\n" http://169.254.169.254/latest/meta-data/instance-typeEnter the following command to get the public SSH key of the attached key pair using the public-keys metadata:
curl -w "\n" http://169.254.169.254/latest/meta-data/public-keys/0/openssh-key
Step 6: Terminating the EC2 instance
AWS bills EC2 usage per second in most cases. Although the account created is a Free Tier account and covers the cost of the instance created, it's good to learn how to stop or terminate an instance from the AWS console once you are done using it.
When you are sure that you no longer need an instance, you can terminate it. The specific instance and the data on the root volume (system disk) is not recoverable (by default) however. So be sure you don't need it before terminating an instance. If you stop an instance, you can start it again later (and access data on all the disks). In this guide, you will terminate the running EC2 instance created earlier.
Return to the EC2 console in your browser.
Click Instances in the left navigation pane. Select the running instance, then click the dropdown menu at the top middle of the page Instance State > Terminate instance.

- Read the Warning from AWS, then click the Terminate button in the Terminate Instances confirmation dialog:

Watch as the Instance State transitions from running to shutting-down and finally to terminated:

Conclusion
In this comprehensive guide, we explored the process of creating your first EC2 instance, starting from signing up for an AWS account to launching the instance, connecting to it via SSH and terminating it. We walked through each step, providing detailed instructions and explanations to ensure a smooth experience for beginners entering the world of cloud computing.
By following the steps outlined in this guide, you successfully navigated the AWS Management Console, selected the appropriate Amazon Machine Image (AMI), configured instance details, set up security groups, and launched your EC2 instance. Additionally, we covered connecting to the instance using SSH and explored the instance metadata.
Finally, we discussed the importance of terminating an EC2 instance when it is no longer needed to avoid unnecessary costs. We emphasized the irreversible nature of instance termination and the need to back up any critical data before proceeding. Termination was demonstrated through the AWS Management Console, where we observed the instance state transitioning from running to shutting down and ultimately terminated.
Now equipped with the knowledge and practical experience of creating and terminating an EC2 instance, you can confidently leverage the power of AWS and EC2 for your future cloud computing endeavours. Remember to manage your instances responsibly, monitor costs, and make use of AWS documentation and resources to further enhance your AWS journey.
Happy computing!